Validating a variable length list, ASP.NET MVC 2-style
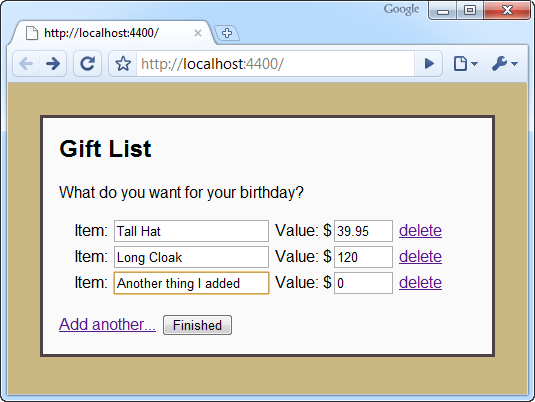
In the previous post I showed a fairly straightforward way to create an editor where the user can add and delete the items in a set. Please read that previous post before continuing to read this one.

But what about validation? We don’t like your blank item names or your negative prices, sonny!
As you probably know, ASP.NET MVC 2 supports DataAnnotations attributes out of the box, so you can mark up your model as follows.
public class Gift
{
    [Required]
    public string Name { get; set; }

    [Range(0.01, double.MaxValue, ErrorMessage = "Please enter a price above zero.")]
    public double Price { get; set; }
}
Server-side validation
Server-side validation is trivial, assuming you want to use the default model binder convention of validating each model object when it’s bound. In the action that receives the form post, just check ModelState.IsValid, and refuse to accept the data if it isn’t.
[HttpPost]
public ActionResult Index(IEnumerable<gift> gifts)
{
    if (ModelState.IsValid)
        return View("Completed", gifts);
    else
        return View(gifts); // Redisplay the form with errors
}
You’ll also need to specify where the validation error messages should appear. Update the GiftEditorRow.ascx partial by placing a couple of Html.ValidationMessageFor() helpers somewhere inside the row.
<%= Html.ValidationMessageFor(x => x.Name) %>
<%= Html.ValidationMessageFor(x => x.Price) %>
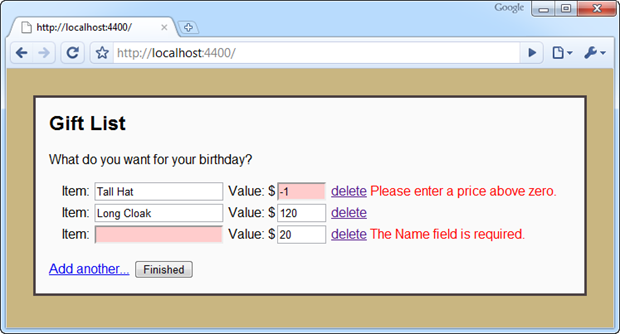
Now, if the incoming data doesn’t satisfy your rules, the form will be re-rendered, displaying appropriate messages.

Client-side validation
It gets a bit more complicated if you also want client-side validation. You could use xVal (I’m not sure whether it would be easier or harder), but I want to get better acquainted with ASP.NET MVC 2’s built-in client-side validation feature, so I’m going to use that.
I don’t even know if there’s an officially recommended way of doing ASP.NET MVC 2 client-side validation when you’re dynamically adding and removing form elements, but I’ll show you a technique I found that will do it. Be warned: this is rather hacky. I’d be interested to hear if anyone can suggest a better way.
First, let’s set up client-side validation in the normal way. Enable client-side validation on your form by calling Html.EnableClientValidation():
<h2>Gift List</h2>
What do you want for your birthday?

<% Html.EnableClientValidation(); %>
<% using(Html.BeginForm()) { %>
    (rest as before)
<% } %>
Now, as long as you’ve already referenced MicrosoftAjax.js and MicrosoftMvcValidation.js, you can run the app and you’ll immediately get working client-side validation! But hang on a minute… it only works for the elements that are present when the form is first rendered, *not* the elements added when the user clicks “Add another…”.
We need a way to capture the extra validation rules added each time the user adds a new row and somehow attach them to the form. One possible approach is to create a new type of custom view result that registers the validators associated with any partial that is renders, and have it emit some JavaScript to attach those validators to the form.
Here’s a possible implementation. Don’t worry if you don’t understand it.
public class AjaxViewResult : ViewResult
{
    public string UpdateValidationForFormId { get; set; }

    public AjaxViewResult(string viewName, object model)
    {
        ViewName = viewName;
        ViewData = new ViewDataDictionary { Model = model };
    }

    public override void ExecuteResult(ControllerContext context)
    {
        var result = base.FindView(context);
        var viewContext = new ViewContext(context, result.View, ViewData, TempData, context.HttpContext.Response.Output);

        BeginCapturingValidation(viewContext);
        base.ExecuteResult(context);
        EndCapturingValidation(viewContext);

        result.ViewEngine.ReleaseView(context, result.View);
    }

    private void BeginCapturingValidation(ViewContext viewContext)
    {
        if (string.IsNullOrEmpty(UpdateValidationForFormId))
            return;
        viewContext.ClientValidationEnabled = true;
        viewContext.FormContext = new FormContext { FormId = UpdateValidationForFormId };
    }

    private void EndCapturingValidation(ViewContext viewContext)
    {
        if (!viewContext.ClientValidationEnabled)
            return;
        viewContext.OutputClientValidation();
        viewContext.Writer.WriteLine("<script type=\"text/javascript\">Sys.Mvc.FormContext._Application_Load()</script>");
    }
}
Now, we can change the BlankEditorRow() action method to render its partial using this custom view result.
public ViewResult BlankEditorRow(string formId)
{
    return new AjaxViewResult("GiftEditorRow", new Gift()) { UpdateValidationForFormId = formId };
}
You’ll notice that BlankEditorRow() now needs to be told which form it should attach the new validators to. You’ll have to update the link to BlankEditorRow to add this information to the query string.
<%= Html.ActionLink("Add another...", "BlankEditorRow", new { ViewContext.FormContext.FormId }, new { id = "addItem" }) %>
Et voila! Each time the user appends a new row, its validators will magically be associated with the form.
The problem with removing fields
If you proceed with this approach, you’ll soon discover a further flaw. Even if the user removes fields from the form, any validators associated with those fields will still be lurking. If a field is displaying a “required” error message, and then the user deletes the containing row, it will become impossible to submit the form because the field is still required, except now there is nowhere to enter any data for it. Whoops!
Again, I don’t know if there’s a recommended way to deal with this, but one possibility is to edit the MicrosoftMvcValidation.debug.js script a little. Let’s update the logic slightly so that, if a validator is associated with fields that no longer exist, the validator should no longer apply.
Find the function called “Sys_Mvc_FieldContext$validate”, and right at the top, add the following:
// [Added] Permanently disable this validator if its associated elements are no longer in the document
for (var j = ; j < this.elements.length; j++) {
    if (!Sys.Mvc.FormContext._isElementInHierarchy(document.body, this.elements[j])) {
        this.validations = [];
        break;
    }
}
Now, assuming you’re referencing the file you just edited (MicrosoftMvcValidation.debug.js, rather than MicrosoftMvcValidation.js), you should get the desired change in behaviour. Deleting a row in the editor now kills its associated validation rules properly, so they don’t rise from the grave and block form submissions like invisible validation zombies.
Summary
Once you’ve got the AjaxViewResult class, it doesn’t take that much work to enable client-side validation on dynamically changing forms. Maybe there’s a better and less hacky way though… Anybody got any suggestions?