Editing a variable length list, ASP.NET MVC 2-style
A while back I posted about a way of editing a list of items where the user can add or remove as many items as they want. Tim Scott later provided some helpers to make the code neater. Now, I find myself making use of this technique so often that I thought it would be worthwhile providing an update to show how you can do it even more easily with ASP.NET MVC 2 because of its strongly-typed and templated input helpers.
Download the demo project or read on for details.
Update (Feb 11, 2010):Thanks to Ryan Rivest for pointing out a bug in the original code and providing a neat fix. Code updated.
Getting Started
For this example I’m going to go with the same theme as last time and build a gift list editor. Our model object can simply be the following:
public class Gift
{
    public string Name { get; set; }
    public double Price { get; set; }
}
Displaying the Initial UI
To display the initial data entry screen, add an action method that renders a view and passes some initial collection of Gift instances.
public ActionResult Index()
{
    var initialData = new[] {
        new Gift { Name = "Tall Hat", Price = 39.95 },
        new Gift { Name = "Long Cloak", Price = 120.00 },
    };
    return View(initialData);
}
Next, add a view for this action, and make it strongly-typed with a model class of **IEnumerable
<h2>Gift List</h2>
What do you want for your birthday?

<% using(Html.BeginForm()) { %>
    <div id="editorRows">
        <% foreach (var item in Model)
            Html.RenderPartial("GiftEditorRow", item);
        %>
    </div>

    <input type="submit" value="Finished" />
<% } %>
I know it would be possible to use ASP.NET MVC 2’s Html.EditorFor() or Html.EditorForModel() helpers, but later on we’re going to need more control over the HTML field ID prefixes so in this example it turns out to be easier just to use Html.RenderPartial().
Next, to display the editor for each gift in the sequence, add a new partial view at /Views/controllerName/GiftEditorRow.ascx, strongly-typed with a model class of Gift, containing:
<div class="editorRow">
    <% using(Html.BeginCollectionItem("gifts")) { %>
        Item: <%= Html.TextBoxFor(x => x.Name) %>
        Value: $<%= Html.TextBoxFor(x => x.Price, new { size = 4 }) %>
    <% } %>
</div>
Here’s where we get to start using ASP.NET MVC 2 features and make things slightly easier than before. Notice that I’m using strongly-typed input helpers (Html.TextBoxFor()) to avoid the need to build element IDs manually. These helpers are smart enough to detect the “template context” in which they are being rendered, and use any field ID prefix associated with that template context.
You might also be wondering what Html.BeginCollectionItem() is. It’s a HTML helper I made that you can use when rendering a sequence of items that should later be model bound to a single collection. You give it some name for your collection, and it opens a new template context for that collection name, plus a random unique field ID prefix. It also automatically renders a hidden field, which in this case is called gifts.index, populating it with that unique ID, so when you later model bind to a list, ASP.NET MVC 2 will know that all the fields in this context should be associated with a single .NET object.
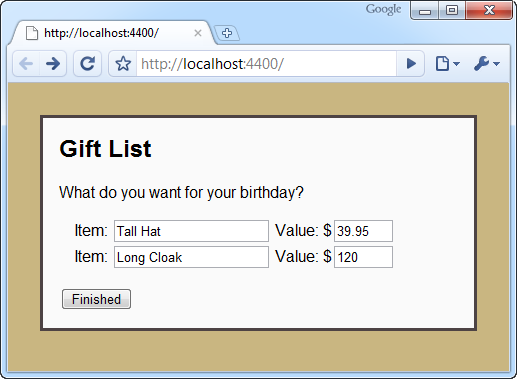
And now, if you visit the Index() action, you should see the editor as shown below. (I’ve added some CSS styles, obviously.)

Receiving the Form Post
To receive the data posted by the user, add a new action method as follows.
[HttpPost]
public ActionResult Index(IEnumerable<gift> gifts)
{
    // To do: do whatever you want with the data
}
How easy is that? Because Html.BeginCollectionItem() observes ASP.NET MVC 2 model binding conventions, you can receive all the items in the list without having to do anything funky.
You could also achieve the same with less code by using the built-in Html.EditorFor() or Html.EditorForModel() helpers, but because these use a different indexing convention (an ascending sequence, not a set of random unique keys), things would get more difficult when you try to add or remove items dynamically.
Dynamically Adding Items
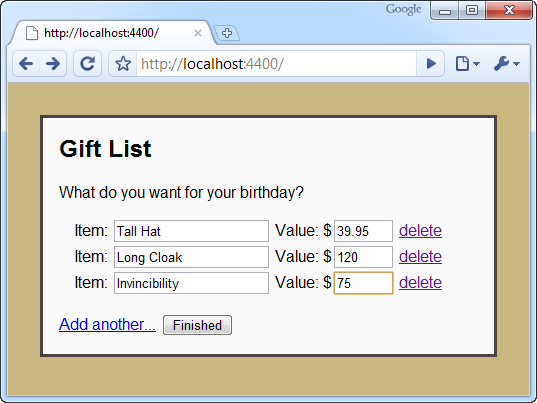
If the user wants to add another item, they’ll need something to click to say so. Let’s add an “Add another…” link. Add the following to the main view, just before the “Finished” button.
<%= Html.ActionLink("Add another...", "BlankEditorRow", null, new { id = "addItem" }) %>
This is a link to an action called BlankEditorRow which doesn’t exist yet. The idea is that the BlankEditorRow action will return the HTML markup for a new blank row. We can fetch this markup via Ajax and dynamically append it into the page.
To make this Ajax call and append the result into the page, make sure you’ve got jQuery referenced, and create a click handler similar to this:
$("#addItem").click(function() {
    $.ajax({
        url: this.href,
        cache: false,
        success: function(html) { $("#editorRows").append(html); }
    });
    return false;
});
Note that it’s very important to tell jQuery to tell the browser not to re-use cached responses, otherwise those unique IDs won’t always be so unique… And before we forget, we’ll need to put the BlankEditorRow action in place:
public ViewResult BlankEditorRow()
{
    return View("GiftEditorRow", new Gift());
}
As you can see, it simply renders the same editor partial, passing a blank Gift object to represent the initial state. I’m very pleased that you can re-use the same editor partial in this way – it means there’s no duplication of view markup and we can stay totally <a href=”http://en.wikipedia.org/wiki/Don” onclick=”javascript:_gaq.push([‘_trackEvent’,’outbound-article’,’http://en.wikipedia.org’]);”t_repeat_yourself”>DRY</a>.
And that, in fact, is all you have to do – each time the user clicks “Add another…”, the client-side code will inject a new blank row into the editor. Because each row has its own unique ID, when the user later posts the form, all the data will be model bound into a single IEnumerable
Dynamically Removing Items
Removing items is easier, because all you have to do is remove the corresponding DOM elements from the HTML document. If the elements are gone, their contents won’t be posted to the server, so they won’t be present in the IEnumerable
Add a “delete” link to the GiftEditorRow.ascx partial:
<a href="#" class="deleteRow">delete</a>
This needs to go inside the DIV with class “editorRow”, so you can handle clicks on it as follows:
$("a.deleteRow").live("click", function() {
    $(this).parents("div.editorRow:first").remove();
    return false;
});
Notice that this code uses jQuery’s “live” function, which tells it to apply the click handler not only to the elements that exist when the page is first loaded, but also to any matching elements that are dynamically added later.
You’ve now got a working editor with “add” and “delete” functionality.

Summary
I hope you can see that editing variable-length lists can be very easy. Other than the reusable Html.BeginCollectionItem() helper, I’ve just shown you every line of code needed for this particular strategy, and in total it’s just 36 lines (including the model, action methods, views, and JavaScript, but excluding lines that are purely whitespace or braces).
Download the full demo project
But what about validation?
Yes, I haven’t forgotten about that! You can already do your server-side validation any way you want – by default the model binder will respect any rules associated with your model.
In the next post, I’ll show how you can integrate this list editing strategy with ASP.NET MVC 2’s client-side validation feature.