Editing a variable-length list, Knockout-style
Following my previous blog post about Knockout, a JavaScript UI library that provides a nice structure for building responsive web UIs with a similar programming model to Silverlight, a few people have asked to see an “editable grid”-type example. There’s a read-only paging grid example here, but what about editing and validating?
Previously I wrote about editing and validating variable-length lists with ASP.NET MVC 2, and before that with ASP.NET MVC 1. Those demos were OK, but it’s way easier with Knockout – it eliminates the most of the complex moving parts and the fiddly client-server interaction, the precise element naming requirements, and the hackery needed to make validation work.
Note: Knockout works with any server-side web development framework,
but this blog post focuses on using it with ASP.NET MVC
Live demo
Before we get into the code, see what we’re about to build. It’s simple, but nice to use. Try it out in this live IFRAME:
Note: Some RSS readers will strip out the preceding IFRAME. If you don’t see the live demo, see this post on the web instead.
Right, how’s it done?
Sending some initial state down to the client
First, define a C# model for the data items we’re editing:
public class GiftModel
{
    public string Title { get; set; }
    public double Price { get; set; }
}
Next, create an action method that renders a view, passing some GiftModel instances to it:
public ActionResult Index()
{
    var initialState = new[] {
        new GiftModel { Title = "Tall Hat", Price = 49.95 },
        new GiftModel { Title = "Long Cloak", Price = 78.25 }
    };
    return View(initialState);
}
… and then, in the view, convert that C# model data into a JavaScript object:
<script type="text/javascript">
    var initialData = <%= new JavaScriptSerializer().Serialize(Model) %>;
</script>
Creating a Client-side View Model
Right now our view model only needs one property – gifts – which will be an observable array of gift items. Once we’ve got that, we can tell Knockout to bind this to any HTML nodes that request binding:
var viewModel = {
    gifts : ko.observableArray(initialData)
};

ko.applyBindings(document.body, viewModel);
To check this is all working, let’s just bind a SPAN’s text content to the length of the observable array:
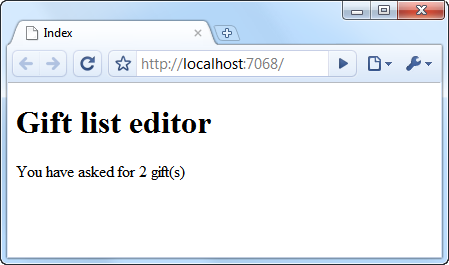
<p>You have asked for <span data-bind="text: gifts().length"> </span> gift(s)</p>
Because gifts is an observable array, the text in this SPAN will be updated automatically whenever the length of the array changes. With all this in place, you should now see the following:
Making an editable grid
Making data editable is a matter of creating HTML input controls and binding them to that data, and the easiest way to create repeated blocks of markup is to use a template. So, here’s how to make a table containing an editor row for each gift item:
<table>
    <tbody data-bind="template: { name: 'giftRowTemplate', foreach: gifts }"></tbody>
</table>

<script type="text/html" id="giftRowTemplate">
    <tr>
        <td>Gift name: <input data-bind="value: Title"/></td>
        <td>Price: \$ <input data-bind="value: Price"/></td>
    </tr>
</script>
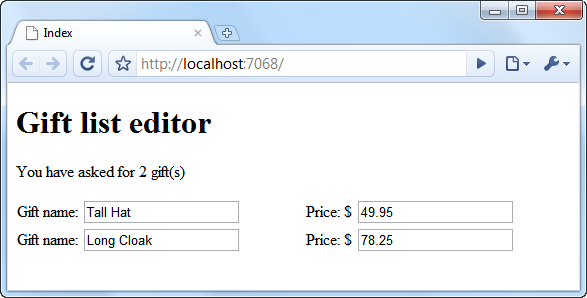
This will produce the following output:
Now, if you edit the contents of the text boxes, it will actually edit the underlying data model. You can’t really see any effect of that just yet, but you will be able to when we save the data.
Adding gifts
Adding items just means adding them to the gifts observable array in the underlying view model; the UI will take care of updating itself. So, create a button that triggers an ‘add’ method on the view model:
<button data-bind="click: addGift">Add Gift</button>
… and then implement such a method, pushing a new blank item into the array:
var viewModel = {

    // ... leave the rest as before ...
    addGift: function () {
        this.gifts.push({ Title: "", Price: "" });
    }

};
That does it.
Removing gifts
Again, you only need to edit the underlying array. So, edit the giftRowTemplate and put a ‘Delete’ link on each row:
<script type="text/html" id="giftRowTemplate">
    <tr>
        <!-- Leave the rest as before -->
        <td><a href="#" data-bind="click: function() { viewModel.removeGift($data) }">Delete</a></td>
    </tr>
</script>
… and implement a removeGift method on the view model:
var viewModel = {
    // ... leave the rest as before ...

    removeGift: function (gift) {
        this.gifts.remove(gift);
    }

};
Now, when you click ‘delete’ on any item, it will vanish from both the underlying data model and the HTML UI.
Saving data (i.e., submitting it back to the server)
Since we’re following the MVVM pattern, all our really important data is in the view model – the view (the HTML UI) is merely a representation of that. So, we don’t want to submit data from the view by doing a regular form post. Instead, we want to submit the state of the view model as this may contain more data than is visible to the user.
First, we need to know when the user wants to save their data. To do this, we can wrap up our UI inside a regular HTML <form> with a submit button, and then bind the ‘submit’ event to a method on the view model. (Doing it this way preserves familiar behaviours like pressing “Enter” to submit a form)
<form class="giftListEditor" data-bind="submit: save">
    <!-- Our other UI elements, including the table and ‘add’ button, go here -->

    <button data-bind="enable: gifts().length > 0" type="submit">Submit</button>
</form>
Notice that I’ve made the “submit” button enabled only when there’s at least one item. Next, add a ‘save’ method that packages up the view model state as JSON and posts it to the server:
var viewModel = {

    // ... leave the rest as before ...
    save: function() {
        ko.utils.postJson(location.href, { gifts: this.gifts });
    }
};
It would be perfectly easy to submit the data via Ajax using jQuery’s $.post or $.ajax methods, but I’ve chosen to use postJson (a utility function inside Knockout) to send the data as a regular HTML form submission instead. That means the server-side code doesn’t have to know anything about Ajax and can imagine you’re posting a normal HTML form. As I said, Ajax works fine too – I’m just demonstrating another option here.
The view model posts the data to the same URL you’re already on (i.e., location.href) because that’s ASP.NET MVC’s convention. To collect the data on the server, add an action method as follows:
[HttpPost]
public ActionResult Index([FromJson] IEnumerable<giftModel> gifts)
{
    // Can process the data any way we want here,
    // e.g., further server-side validation, save to database, etc
    return View("Saved", gifts);
}
That’s pretty easy! This fits into ASP.NET MVC’s usual data-entry conventions – the server-side code is totally trivial. It doesn’t use ASP.NET MVC’s usual data binding mechanism so you don’t have to worry about element naming, field prefixes, and all that; instead, the data is packaged as JSON and deserialized using [FromJson]. I’ll omit the source code to [FromJson] for now, but it’s totally general-purpose, only about 10 lines long, and is included in the downloadable example with this blog post.
The server-side code can now do whatever it wants. For this example, I’m just rendering a different view to show what data the server received.
Adding Validation
Right now, somebody could enter a text string for “Price”, and then this will cause a deserialization error on the server. This is an abomination, and must be stopped! Let’s add some client-side validation.
Knockout works nicely with any client-side validation framework that can cope with you dynamically modifying the DOM. jQuery.Validation copes perfectly with that, so let’s use it. Having referenced jquery.validate.js, define rules by putting special CSS classes on the elements in the template. (Note that jQuery.Validation lets you define custom rule logic in this way, too.)
<script type="text/html" id="giftRowTemplate">
    <tr>
        <td>Gift name: <input class="required" data-bind="value: Title, uniqueName: true"/></td>
        <td>Price: \$ <input class="required number" data-bind="value: Price, uniqueName: true"/></td>
        <td><a href="#" data-bind="click: function() { viewModel.removeGift($data) }">Delete</a></td>
    </tr>
</script>
Notice the “required” and “number” classes. One other thing to bear in mind is that, although Knockout doesn’t need your bound elements to have names or IDs, jQuery.Validation does depend on every validated element having a unique name. That’s why I’ve put uniqueName:true into the bindings. This is a trivial binding I added that just checks whether the element has a name, and if not, gives it a unique one. An easy workaround for the jQuery.Validation limitation.
Next, remove the “submit” binding from the form, and tell jQuery.Validation to catch the form’s submit event instead, and to call our view model’s save method only if the form is valid:
$("form").validate({ submitHandler: function() { viewModel.save() } });
That’s it! Now the user can’t submit blank fields, nor can they submit text for the “Price” fields. They can still add and remove items, though, and this doesn’t affect the state of the validation feedback for other rows in the table.
Of course you can still validate the data on the server, too – and you need to if blank data would actually violate your business rules in some important way. Typically I’d recommend putting such logic into your domain layer, to ensure the rules are always respected no matter what UI technology (ASP.NET MVC, Knockout, Silverlight, an iPhone app) is connected to it. To display any errors, you can use something like an ASP.NET MVC “ValidationSummary” helper. (Or you can just throw an exception and give up if it looks like the user is deliberately bypassing client-side validation – it’s up to you.)
There’s plenty more I could describe here, such as how to use bindings to add animated transitions (e.g., applying jQuery’s fadeIn or slideUp when users add or remove items), but I think this is enough for now.
Questions and support
I’ve had plenty of questions about how to do things with Knockout since my blog post last week. To capture these discussions and make them public, I’ve made a Google Group for Knockout at http://groups.google.com/group/knockoutjs – please use this for general questions about the framework. However if you have comments about the particular example shown in this post, go ahead and post them here on this blog.
If you want to play with the gift list editor code a little more, download the demo project.

